Apowersoft Free Screen Capture is a free online tool for you to take screenshots on both Windows and Mac. It allows you to capture screenshots, add some annotations, save them to local drive/Cloud space or share the snapshots to social media sites instantly. In order to let you know how to use this tool, we write this guide to show the steps of using it in details.
Operating Environment
- Windows 10/8/7/XP/Vista
- Mac OS X 10.7 and higher
Launch Free Screen Capture
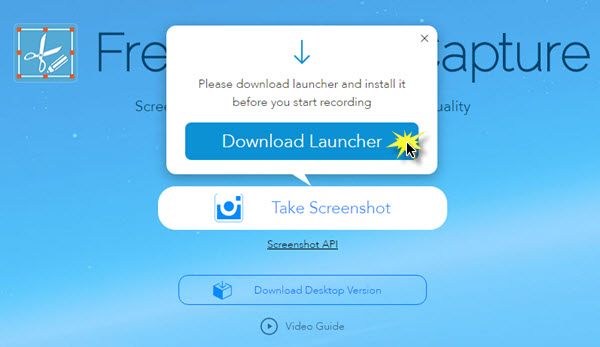
Go to the page of Apowersoft Free Screen Capture and click on “Take Screenshot” button to run this application.
Tips: If it’s the first time you use this application, please hit “Download Launcher” after clicking on “Take Screenshot” button. This launcher is 100% safe and you don’t need to worry about the security problem. When the download is completed, please install this launcher. After that, you can go back to the page and run this screenshot tool.
Capture and Edit Screenshot
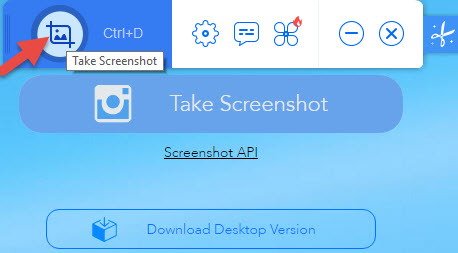
Once the application is activated, its interface will pop up on your desktop. You could either press the “Control” + “D” or click the “Take Screenshot” icon on the interface to start capturing screen.
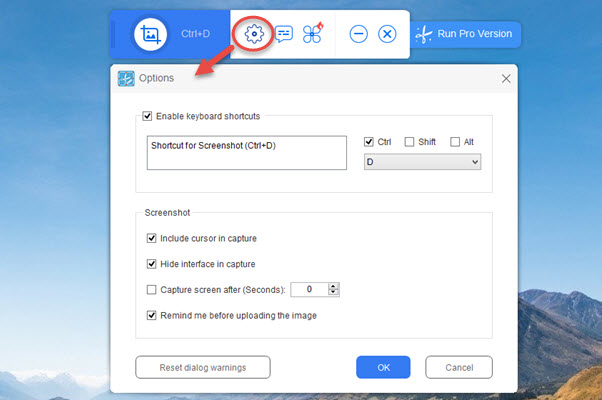
You can also set your own shortcut for screenshot as you like in the “Options”. From there, you are allowed to configure other screenshot settings as well.
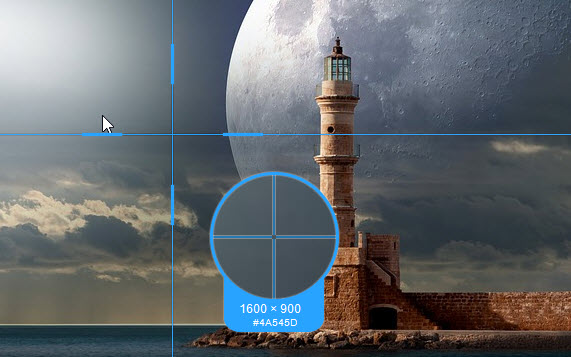
When your mouse cursor turns into a cross-hair, you can easily create snapshots in the ways as instructed below.
Entire Screen: Click your mouse anywhere on the screen to get a full screen screenshot.
Region: Click, hold and drag your mouse to select a region on your screen, and release your mouse to confirm it.
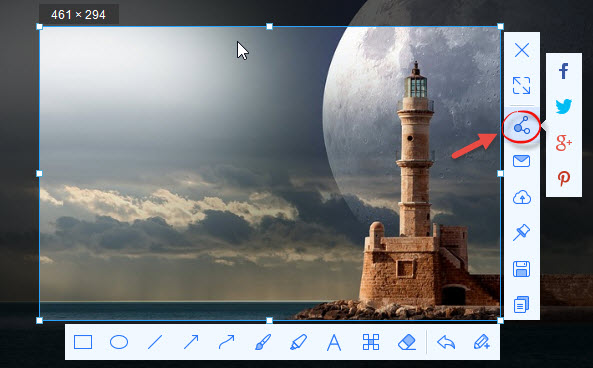
Upon the creation of a screenshot, you will see blue frames around it with toolbars on two sides. There are options on the horizontal bar for you to edit the image with texts, lines, blur effects, etc. With these annotation options, you can markup important parts or cover private information on the screenshot.
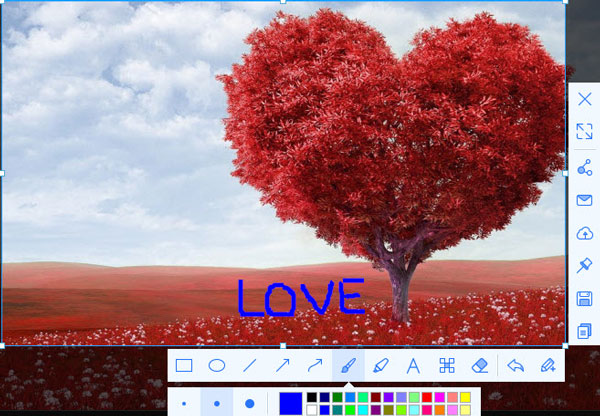
Once you’re done, you can save the image to your local disk by clicking the second last button on the vertical toolbar. Alternatively, you can copy it to the clipboard, email it, upload it or share it to your social networks like Facebook, Twitter, Google+, etc. And all these options can be found on the vertical toolbar.
Save: Save your screenshot as JPG, PNG, GIF, TIFF or BMP file to your local drive.
Upload: Preserve your snapshot on the free cloud space provided by the developer.
Share: One-click to share your image to your social networks.
Email: Send your screenshot to your mail as an attachment.
Tips on uploading and sharing screenshot
Upload the Screenshot
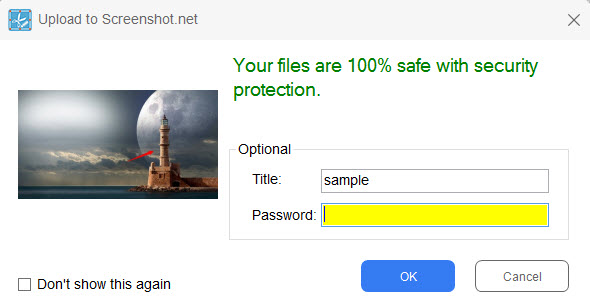
Click on the “Upload” icon on the vertical toolbar. You will see an uploading window for entering title and password for the screenshot. You can pass it, but the screenshot will be 100% safe with a password. Click on “OK” to confirm uploading.
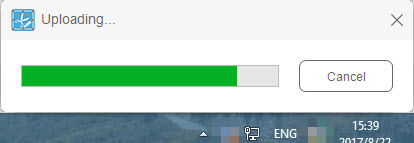
While uploading, an uploading status window will appear on the bottom right of your computer screen.
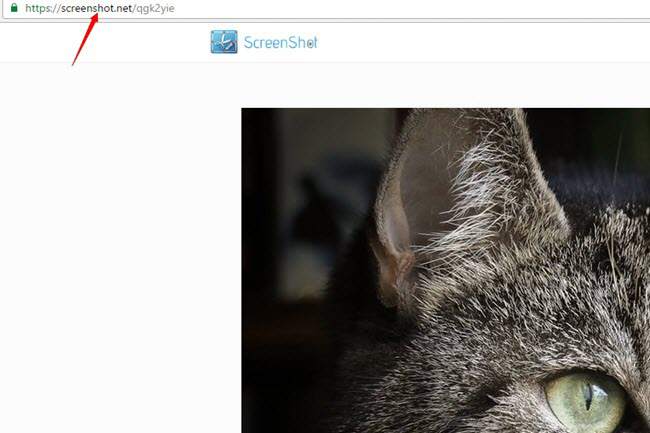
Once the screenshot is uploaded, you will be directed to the screenshot page. And there is a direct link to the screenshot, which you can use to insert the screenshot in forums and blogs.
Share the Screenshot
Upon the creation of the screenshot, you can also choose to share it to your social media sites instantly. Just click the “Share” button on the vertical toolbar and choose the site you want to share the screenshot to. Currently, it supports sharing to Facebook, Twitter, Google+ and Pinterest.
Those are the details of using Apowersoft Free Screen Capture. If you want a more powerful and stable screen capture tool, you can download and use its pro version. It has more than 10 screenshots modes for capturing screen in any shapes, an advanced image editor for editing images with various effects, a task scheduler for taking screenshot automatically and a screen recorder for making videos. Just click on the download button below and install it to enjoy all these cool features.

Leave a Comment