Streaming Audio Recorder is a practical software which allows to record audio from computer and microphone. It also comes with some extensional functions such as convert/search/manage/download audio files. Let’s check the guide to learn more:
Install Streaming Audio Recorder
Below is a video for guiding you how to use Streaming Audio Recorder, you also follow the instructions in it.
Settings
After launching Streaming Audio Recorder, you could make some settings before recording audio.
Hit “Settings” icon, then select “Settings” in the dropdown menu. In the “Settings” Window, there are three tabs – “General settings”, “Record settings” and “Download settings”.
1
General Settings
Under the “General settings”, you can customize keyboard shortcuts for recording as you want and check for updates on startup and so on.

2
Record Settings
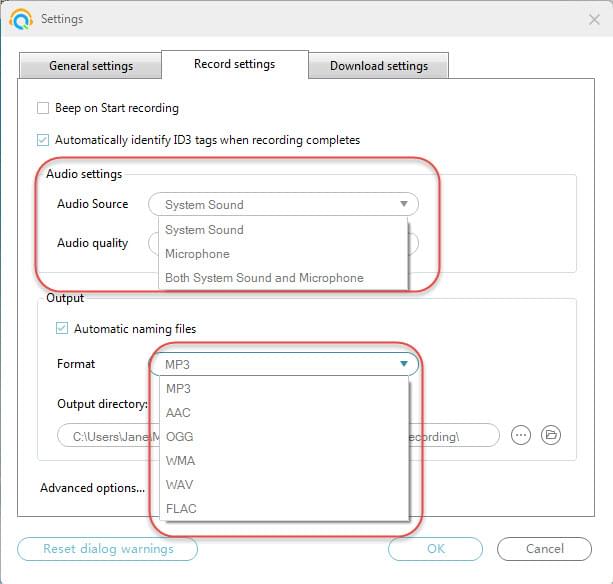
Under the “Record settings”, more options are provided.
i
Select the Audio Source
You can choose to record audio from “System Sound”, “Microphone” or “Both System Sound and Microphone”.
If you choose to record audio from “System Sound”, you can record any sound playing on your computer.
If you choose to record audio from “Microphone”, you can record your own voice or vocals through Mic.
If you check “Both System Sound and Microphone”, your computer sound and your own voice will be recorded at the same time.
ii
Identify ID3 Tags
It will help you get the detailed info like song name, artist, genre and cover of the recorded music automatically.
iii
Set the output format and folder
Before audio recording, you can set the output formats as MP3, AAC, OGG, FLAC, WMA, WAV and etc.
If you don’t wanna put your recorded audio files into the default output folder, you can select other folder as output directory.
iv
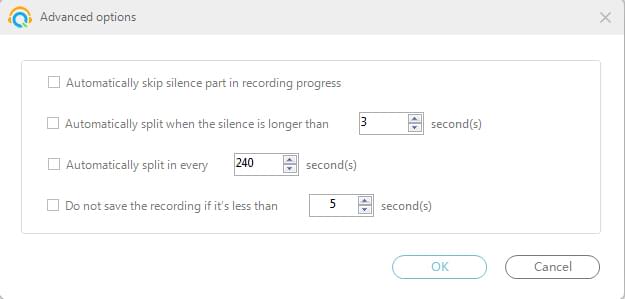
Advanced recording settings
It offers you “Advanced options” under “Record settings”. By utilizing these options, you could control audio recording easier.
For example, you can skip the silent parts during recording procedure automatically. And you can set the software to auto-split audio at set time.
3
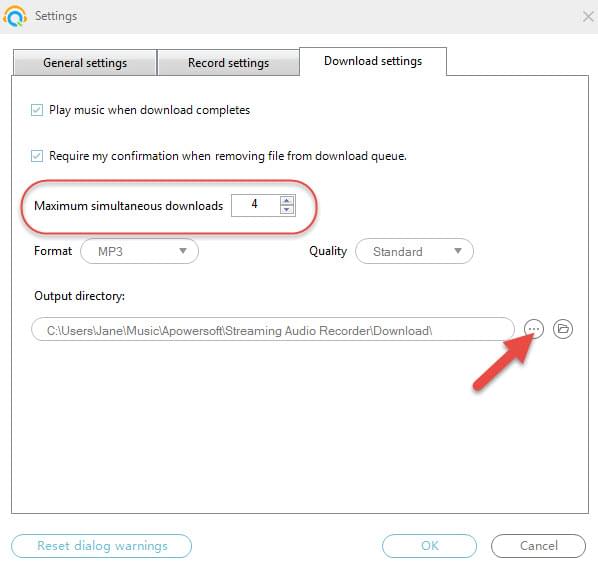
Download Settings
Under “Download settings”, you can set the output directory of the downloaded songs and set the “Maximum simultaneous downloads”.
Record Sound
Using Streaming Audio Recorder, you can record any sound playing on your computer. Just play the song and then click the red round bottom on the left bottom of the main interface to start your recording. Hit the same button to finish recording and the recorded file will display on the interface immediately. While recording, the music information will be added to the tracks automatically (Set it in “Recording Settings”).
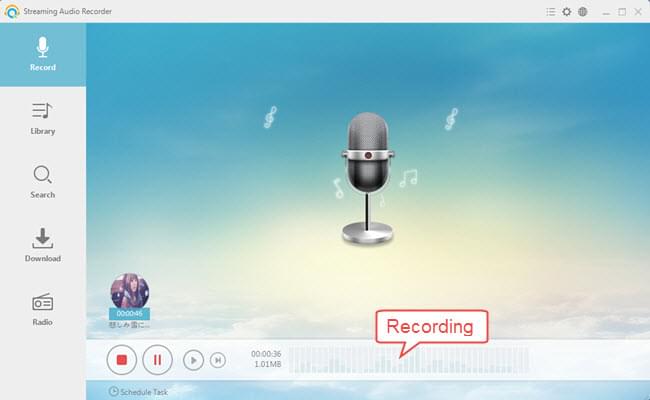
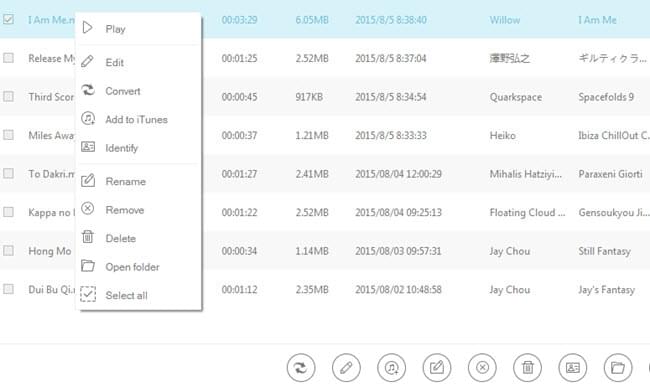
Switch to the “Library” interface, you could checked the recorded files. Right-click the file, you can experience the functions below:
Set Schedule Task for Audio Recording
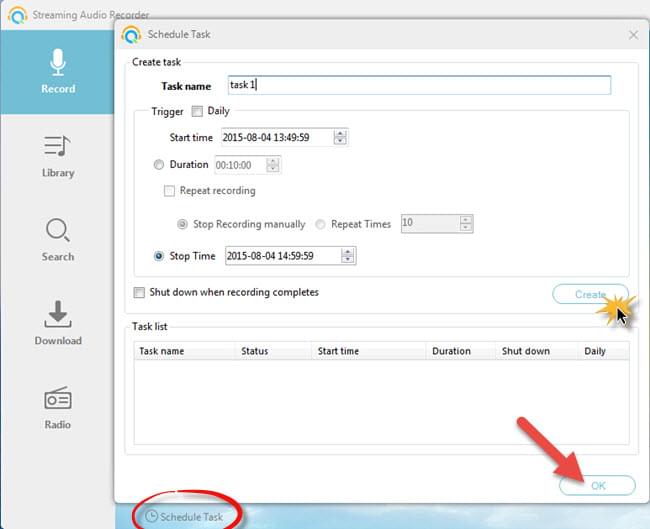
Except recording audio manually, you are enabled to set schedule for auto recording audios.
Audio Edit
Hit “Tools” – “Audio Editor” to activate the inlaid editor.
1
Load file
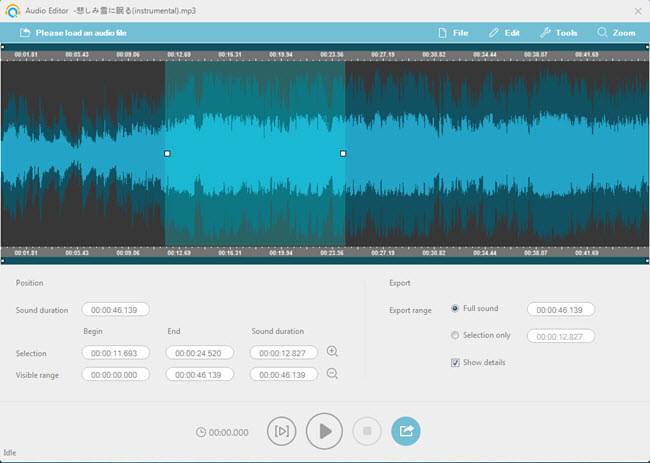
Click ![]() and open the local folder, select a file. It will be displayed as waveform.
and open the local folder, select a file. It will be displayed as waveform.

2
Editing
i
Select Region:
You need to select a region before conducting edit operations.

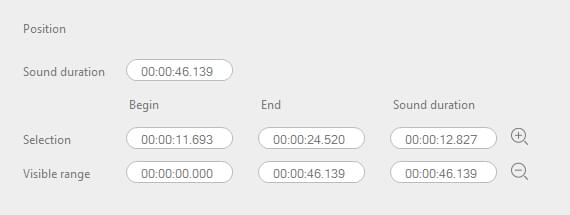
Accordingly, the duration of selected part will show on the lower part of interface.
ii
“Edit” Menu:
(*Paste can only be used after you have used the “Cut” or “Copy” functions to take a selected region to the clipboard.)
iii
“Tools” Menu:
3
Playing
You can playback selection region or play the full audio just click on “Play selected part” and “Play all”. But if your selection is empty, the “Play selected part” button will be disabled.

4
Resample and export (Save Audio File)
To export edited files, click on ![]() .
.
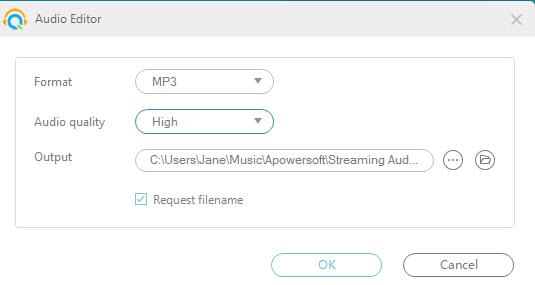
The edited file will be saved to your computer.
Search and Download Music
1
Search Music
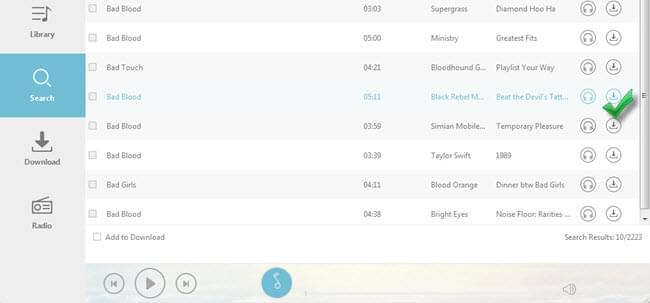
Switch to “Search” interface. Input keywords into the blank box and click “Search” icon. The results will display, you can play them online or click “Download” icon to download them. To conduct batch downloads, tick several songs then hit “Add to Download”.
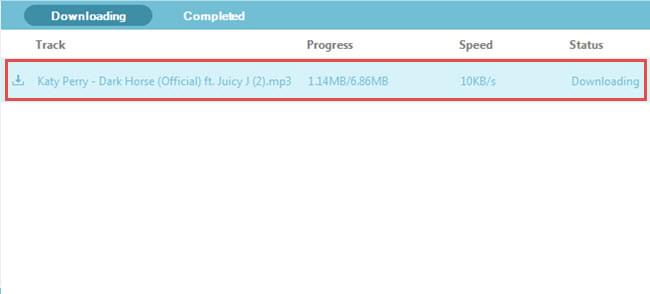
On “Download” interface, you can check the downloading progress.
2
Video to MP3
You can extract audio files from online video sites, such as YouTube, MySpace, Vimeo and so on. Choose “Video to MP3” in “Tools” menu, then a window will pop up. All you need to do is copy and paste URL into the URL box, then click “Add to Download”.
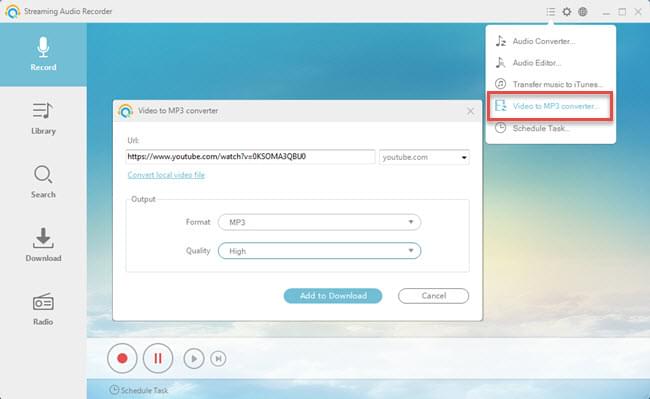
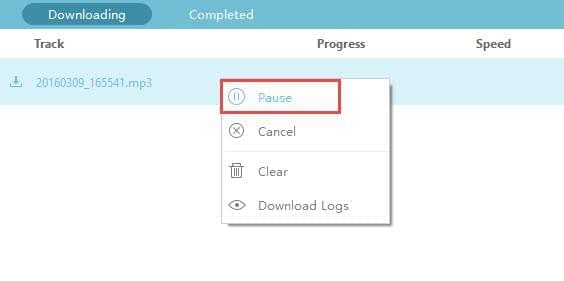
While downloading, you can right click on it and click “Pause” to pause it.
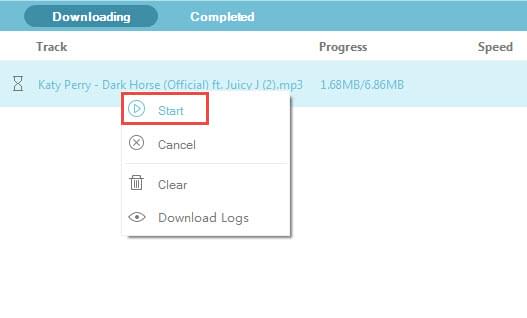
To resume downloading, please right click the file and choose “Start”.
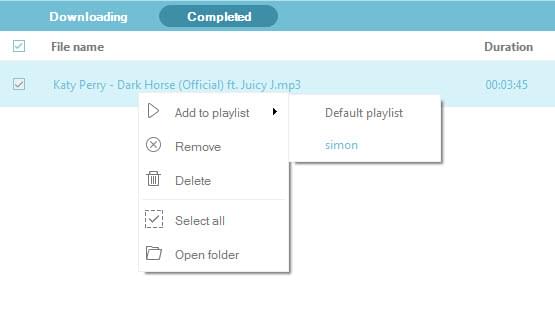
When completed, you can right click on downloaded file to select functions such as “Add to playlist”, “Remove”, “Delete” and etc.
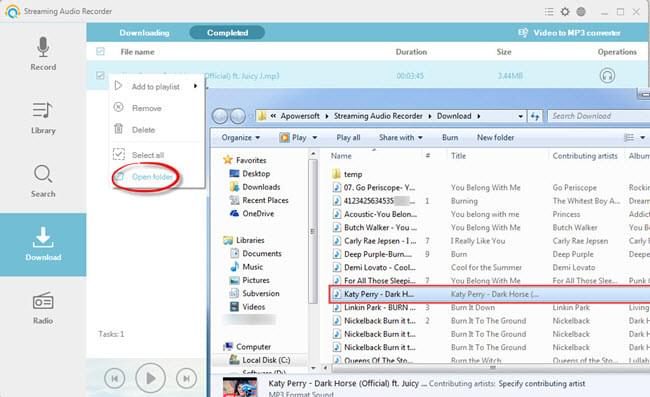
You can click “Open folder” to locate the file.
Radio
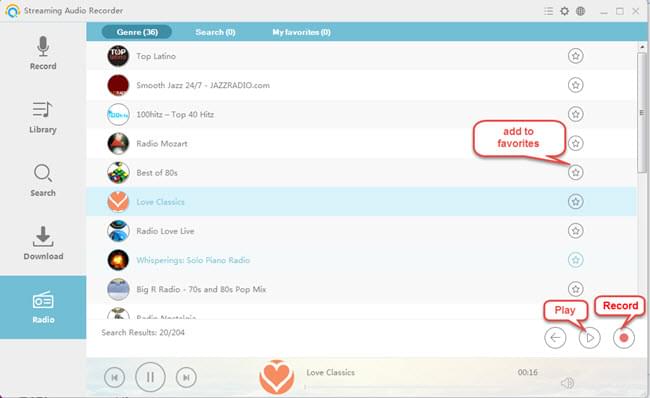
Switch to “Radio” interface, you will see a list of genres. Click your interested one, then the radio stations will be displayed. Select a station, click the “Play” icon on the right corner of the interface to start listening radio. While listening, you can record it or add the station to “My favorites”.
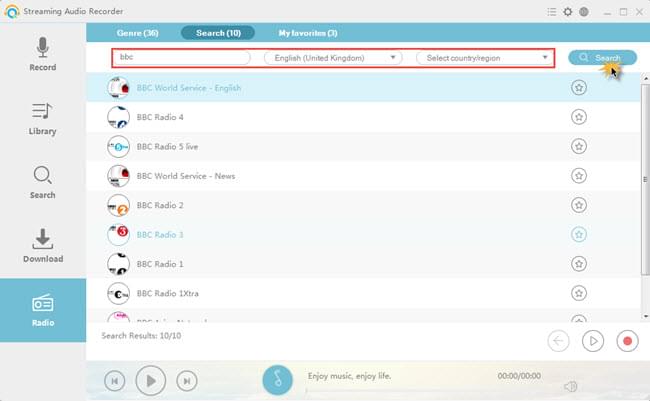
You also can find your desired radio by searching. Hit “Search” tab, enter keyword in the search box, then set “Language” and “Country”. Press “Enter” key, the results will appear.
Please contact our support team if you come across other problems when using the software.
Leave a Comment