Watching the live stream of some important events is one of the things that most people love to do. On the other hand, not all people are able to watch these shows because of the busy schedule they have. As a basketball lover, it’s so frustrated whenever I missed a game of my favorite team especially if it is a championship game. The good thing is that I have recently found a tool that helps me solve my problems about how to watch the live streaming of whichever event I am not able to watch because of a hectic schedule I have. The tool is Apowersoft Mac Screen Recorder that allows you to capture streaming video on mac.
Apowersoft Mac Screen Recorder is an efficient tool that works well in capturing streaming video. As I’ve said a while back, it can be used in recording live streaming video on Mac when you want to record down and watch later. Moreover, there’s a built-in task scheduler for you to create task and record screen during our absence. Although some live streaming videos can be watched again over the internet, by using this tool, all you need to do is to click a button to record your screen activities and then save it as video when it’s done.
How to record live streaming videos
In the following part, I will share you the steps on how to record live streaming video on mac.
- Step 1: Download and install the tool in your Mac computer.
- Step 2: Start Apowersoft Mac Screen Recorder before the program starts.
- Step 3: Open the web browser and stream he video you prefer.
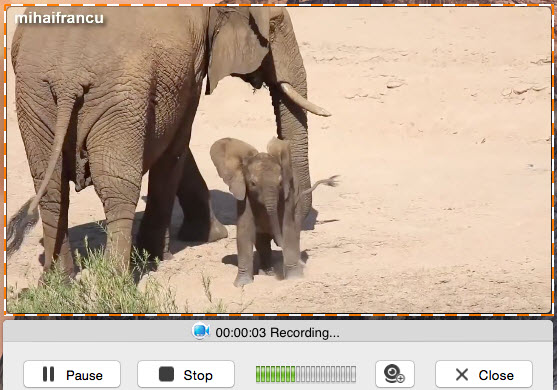
- Step 4: Resume to the program, click to start recording and drag a region on the playback window and press “OK” button to get start.
- Step 5: Click the “OK” button to start recording.
- Step 6: Hit on “Stop” button to finish recording when the playback is over.

Tips: As said, there’s also a task scheduler for you to perform screen recording automatically. With this tool, you can grab the live show that is only available for only some time on web. To do this job, you can simply press “Create schedule task” at bottom of the interface then configure preferences in pop-up window, such as recording time, duration and region, etc. Next, click “Create” button to enable the task, the program will start working when it reach the time point.
Extra tips of the tool
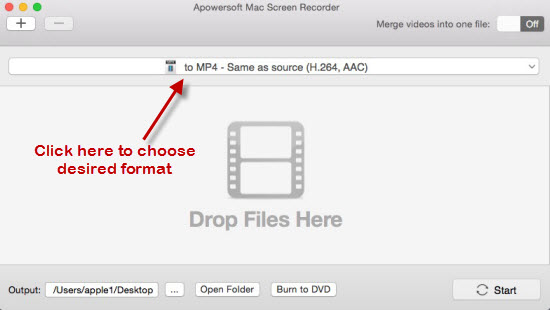
This program allows you to make video tutorials, reviews, demo, or anything you want to share on a video with high definition. Moreover, users can choose whether to capture the full screen of their Mac PC or just capture a part of it. Additionally, it can also record video directly from the webcam (just make sure you have a webcam installed of course). Another good thing about this tool is that it can record screen and audio activity on your computer. This tool also helps users to convert videos in different formats such as AVI, MP4, FLV, SWF, 3GP, MKV, MPEG and popular formats for Apple and Android devices. Which means, you can export the videos to other devices with no need to convert the formats. Actually, this tool is used in recording anything you see on your Mac PC.

Video capture for Mac is just so easy to do with the help of the right tool. Good thing I found the tool which I considered as the best. In the end, the problem of being not able to watch live videos will be solved. Not only that, with usage of its other features, more things can be done with the help of the tool.
